
My Plans for Updating Our Small 1960's Ranch Kitchen
I’ve always dreamed of having a great kitchen. White countertops, marble, a pretty sink, and a french gas stove - *sigh* a girl can dream.
I’ve always loved to cook and keep finding myself in less than ideal spaces to do so. Whether the case was renting in an older home or having a small budget, I haven’t had many options to achieve my dream kitchen goal - yet. This year, we decided to work on updating our house for a reappraisal. From research, I now know one of the biggest “selling points” is the kitchen, so we started making a plan to update the kitchen inexpensively.

Learning From the Past
A few years back in our rental, I tried an inexpensive kitchen update using contact paper and peel and stick tiles. I have to say - I do not recommend going this route. The peel and stick tiles were great, but the contact paper was a nightmare. I read using a hair dryer would be a big help for stretching pieces over the side and smoothing the bubbles. This left me with heat blisters on my fingers and curled contact paper edges after it cured. In a word - the project was a nightmare. I never shared this experience because of how bad it was, until now.
Having learned a great deal from this experience, when I sat down to plan our kitchen update, I knew a few things. Contact paper was out of the question and I want to hire someone to update the backsplash the right way.
The Current Kitchen Situation

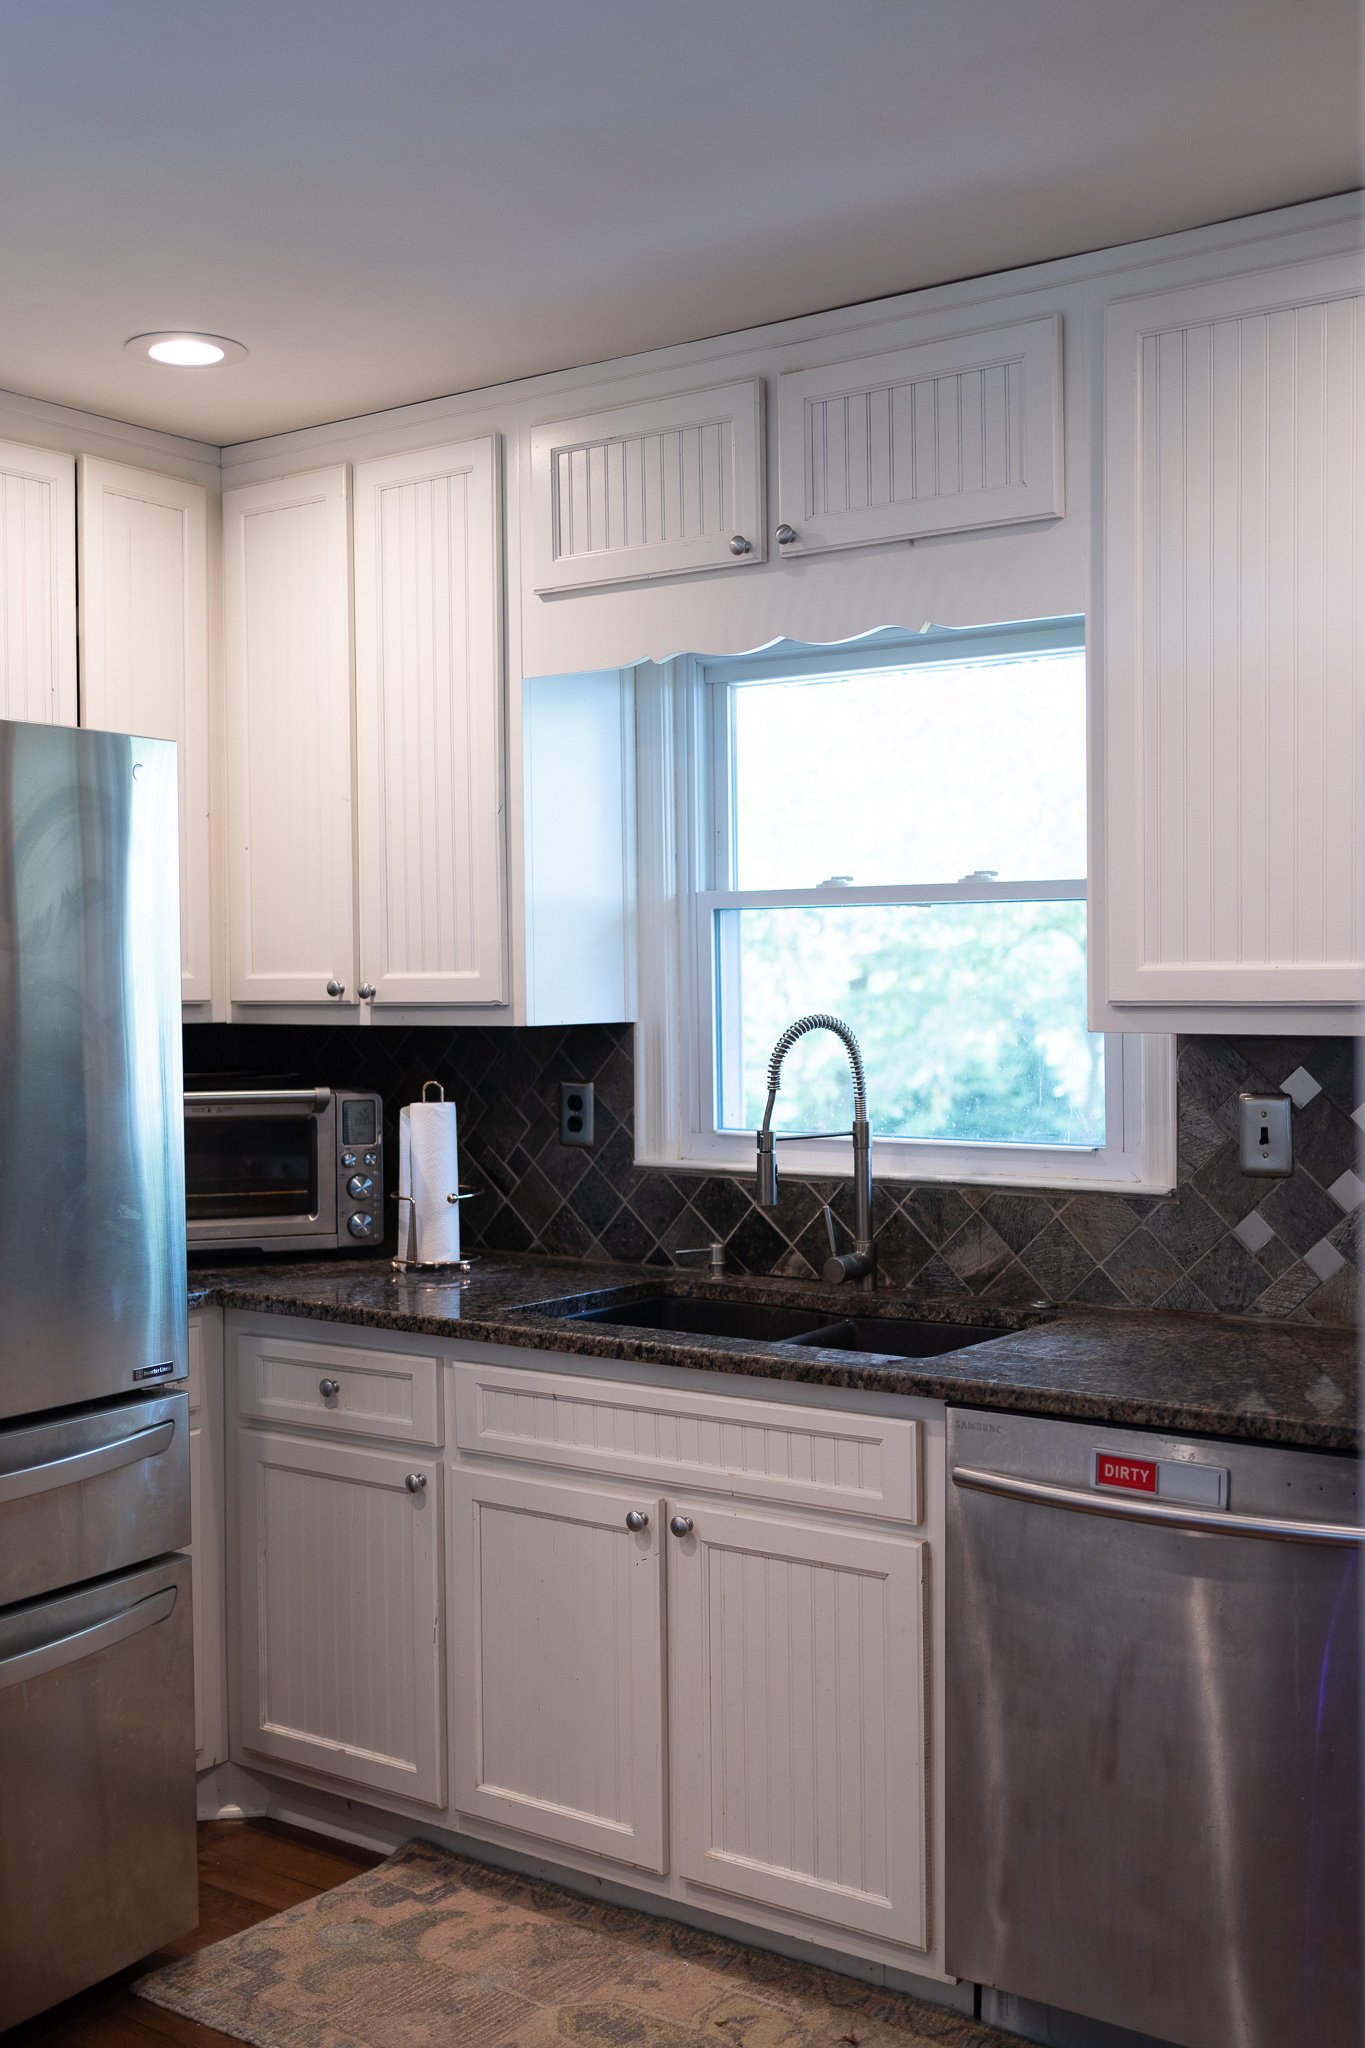
The previous owner of the house must have been a bachelor who loved to use dark colors wherever he could - the uglier, the better. I guess he thought that the reflective element of the stainless steel tile would not only brighten things up, but tie in the appliances. Smart move, dude.
He also thought a black sink and speckled black countertops would do a great job of hiding those crumbs he never got around to cleaning. Guess he forgot that black sinks do a pretty good job, after all, of showing all kinds of marks. Whoops. But let’s really talk about his best design element - leaving the 1960s decorative skirting and cabinet above the window. It really gave the room the feminine touch it needed.

My Plan & Progress Thus Far

Cabinets

Originally, I browsed new faces for the board and batten cabinets but I was shocked at how expensive it was (ringing in at around $80 per face). I wanted to find a way to make them look brand new and more refined. Once I consulted with my woodworker, Nathan, we discovered a thin hardboard panel called a Eucaboard. The entire cabinet project would ring in at just around $100 for materials, how could I complain?
Nathan cut the Eucaboard to the size we needed and used liquid nails to adhere them, we then caulked the edges so that they would look flush.
The next change was to paint the cabinets. In addition to the terrible aesthetic of the kitchen, the paint on the cabinets was peeling off in sheets. We took all of the cabinets off of their hinges and started sanding them down using this sander. The entire process of sanding took about two days. I started with an 80 grit sandpaper to remove the paint and then went back over them with a 220 to smooth the wood.
Right now I’m at the stage of painting the cabinets. I wanted to find a color that would match our existing countertops or something that would work if we could update them to white. We have a really dark, outdated granite countertop, but I wanted to try and make it work. I was between a really deep navy and a cappuccino shade of white. Because the dark navy color could make the kitchen look smaller as previously discussed, I decided to go with Farrow & Ball’s Joa’s White in Satin enamel. I’ll be painting those over the next week and will share the progress on instagram!
Another major change to our kitchen was the removal of a very old-school looking cabinet that was above our sink. It had skirting on it that was clearly original to the house. We tore it out and the room instantly felt taller and larger.

Countertops

Once I decided on the paint colors and the hardware, I realized I really wanted to update the countertops (who’s surprised?). After getting a couple of quotes from some local vendors, I was surprised at the cost for our small, 30 square-foot area. It was not going to fit our budget, and per usual I was told I have expensive taste - my Achilles heel.
I did a little more research and discovered Gianni Granite. They make countertop paint that can be used on multiple different surfaces, genius. I watched a tutorial and the application process seemed simple enough so I was sold. The paint comes with a marble effect, but for now, I’ve decided that I’m going to paint the countertops white and do a marble backsplash.
Backsplash
One of my least favorite things about the kitchen is the stainless steel and tile backsplash that I affectionately referred to earlier. One of you even messaged me to say the tile should be illegal, and I couldn’t agree more. It’s safe to say that I’m beyond excited to see how the marble subway tile turns out.
Microwave to Vent Hood

I toyed around with the idea of open shelving, but my husband kindly reminded me, I’m not an “open-shelf type of girl”. Although he made a solid point, I still wanted to incorporate an open-shelf feel. So, we have decided to take out the microwave above the stovetop (shoutout to my husband for letting this happen), replace it with a hood range, and put an open shelf to the side of it. I found an inexpensive hood range insert with great reviews.
I drew up (in photoshop) a specific craftsman style that I wanted and have Nathan, my woodworker, building it now. To make the kitchen feel a little more formal, I decided to add some molding and paint it, rather than keeping the wood exposed.
Sink
Our black sink shows every little speck of anything and it’s beyond annoying. No matter how often I clean it, it still looks dirty. I will be replacing it with a white drop-in sink (still looking). I also plan on replacing the faucet with one that is similar in style but a different color, something that feels formal.

I am super excited about all of these updates and I can’t wait to see how it all turns out! Our end date is set for November. Don’t miss an update by following me on Instagram, and watching my story highlight “Kitchen Update.”
